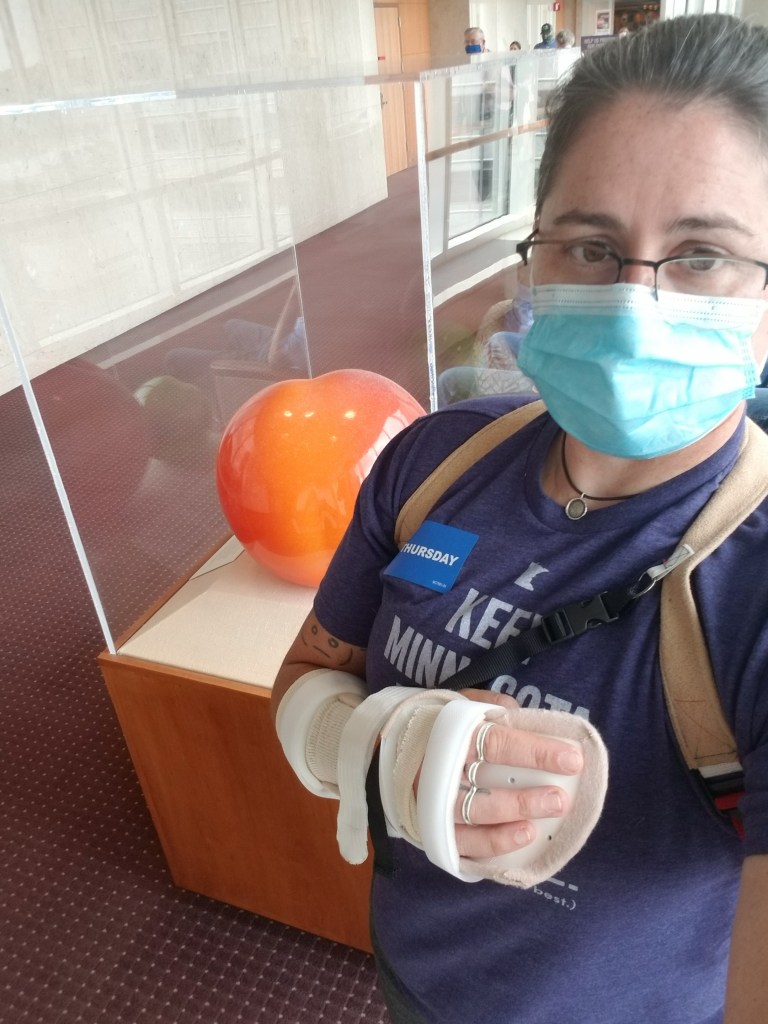
I don’t know that I’d call myself an expert, but after 5 surgeries on my hand, I think I have enough experience to at least put “surviving hand surgery” as a skill on my resume!
All of the surgeries on my hand have been “elective,” which just means that they weren’t an emergency situation. That means I had some time before each one to prepare and make my recovery easier. And that makes a big difference!

Step 1: Get Training
Since it’s my dominant hand that’s affected, I practice everything from eating to using the bathroom to getting dressed using my other hand. It’s slow and often frustrating, but getting over that frustration before surgery makes recovery that much easier!
Being in a cast or splint after surgery also means muscle atrophy so I work on strengthening as much as I can to get a good head start. In the case of this last surgery, I worked on strengthening my thumb, pinky, wrist, arms, shoulders and back. Everything from my elbow to my back was going to be supporting the extra weight of the cast so having them all strong and balanced can help prevent the future need for physical therapy.
I also do a lot of exercises to strengthen my core. A strong core makes it easier to get in and out of bed without hands and it’s very helpful for stabilization and balance when your arm is in heavy cast!
Step 2: Home Prep
Temporary one-handed living is easier when you have the environment set up for it. That means making everything as easy as possible for yourself, from stocking the fridge & pantry, to having ice packs and pants with elastic waistbands at the ready.
One of the biggest things I focus on is post-op sleeping arrangements. I set up a place where I can keep my arm elevated above my heart, usually a couch, so I can sleep uninterrupted at any time of the day. That first week I make sleeping and recovery the priority.
It might seem obvious, but I also make sure I have all of my technology stuff easily accessible from where I’ll be sleeping. That can mean having a table nearby to hold a phone or laptop, as well as all of the charging cables, plugged in and within reach. Sleep is erratic that first night or two and the last thing I want to do is risk disturbing my family in the middle of the night because I can’t sleep and the battery died on my phone!
Step 3: Pain Control
I’m the first to admit that after a lifetime of training as an endurance athlete and years of chronic pain in my hand, I have a very messed up perception of pain. But I still feel pain even if I don’t always consciously acknowledge it. Through five hand surgeries, I have only ever taken one opiod pain pill, and only because it was prescribed and doctors know best, right? I didn’t like how my stomach felt with the pain med and I didn’t feel like it did much for my pain, so I stopped after that first dose. I have also read enough studies on over the counter pain meds that suggest healing is faster without them that I prefer not to take those either. Instead, I use other techniques to deal with the pain.
Elevation. The number one trick for decreasing pain and swelling is keeping my hand elevated above the level of my heart at all times. That includes eating, sleeping, stretching, everything! As soon as it drops and the blood starts to pool in my hand I can feel the pain and the pressure start to build. Usually after the first two weeks I can start to lower it and by three weeks I can take longer walks with my arm swinging at my side.
Ice. It doesn’t make things heal faster, but it does help with pain. In a cast I can’t put an ice pack directly on the surgical site, so I do the next best thing: put it between the pain and the brain. That means putting it on my forearm or bicep to help my hand. It helps a lot with the surgical pain.
Breathing. Like Lamaze or Yoga, taking control of my breathing helps when I get sharp waves of pain, either surgical or nerve pain. Slowing my breathing and making it deep, using my diaphragm, helps me get through those rough patches. Typically they only last a few minutes before things tone down again, and while I’m not sure if the deep breathing makes it shorter, it does make it more manageable.
Acceptance. The real key to dealing with the pain is to accept it. The more I fought it in the first two hand surgeries, the worse it felt. When I finally let go and accepted that it was going to hurt, it made the next three surgeries easier. I remind myself that it’s healing pain which means it’s temporary and it gets a little better every day. And with patience, it does get better!

Leave a comment